"Where's that" Manual
This is manual of “Where’s that”.
(日本語マニュアルはこちら)
Please contact me if there are any questions. And also check here as well.
Contents

Introduction
This app manages the storage location of Blu - ray, DVD / CD, Book and others.
The app can set the level(three-dimensional) of storage location, and if it’s set as “box-folder-sheet” for example, it can manage like “4th sheet in folder 3 in A-box, it will.
You can set the storage location name and your own items in advance. When you want to customiz, please set each item by “setting” before using.
Settings
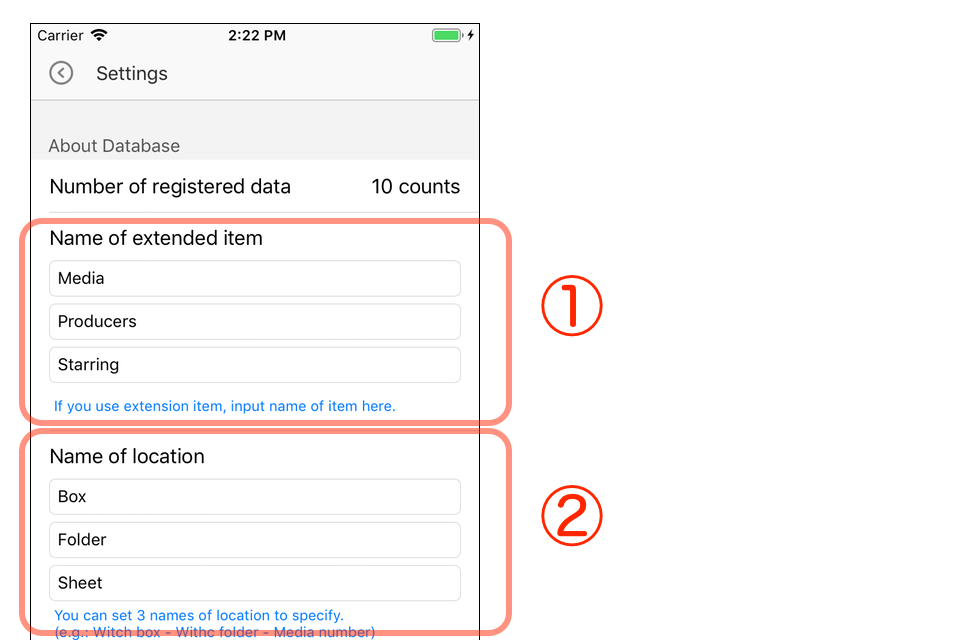
Tap the gear-icon from the top screen to switch to the setting screen.
If you want to use your own items, set in part ①. If you want to use your own the storage location name, set in part ②.
Entry
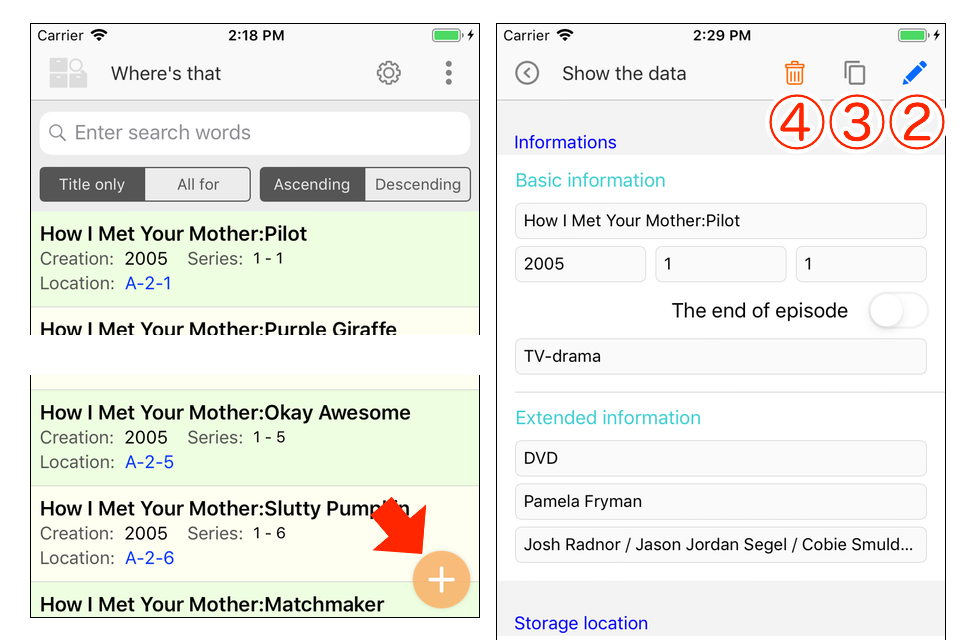
To enter new data, tap ①. To modify the data, tap the list to show the data, and tap ② to enter the correction mode. When you nead to duplicate data, tap ③ to copy the showed data and enter it.
In any case, once you have entered the data, you can complete the registration with the chec-icon in the upper left of the screen. The title is a required input item.
To delete data, show data and tap ④.
Search
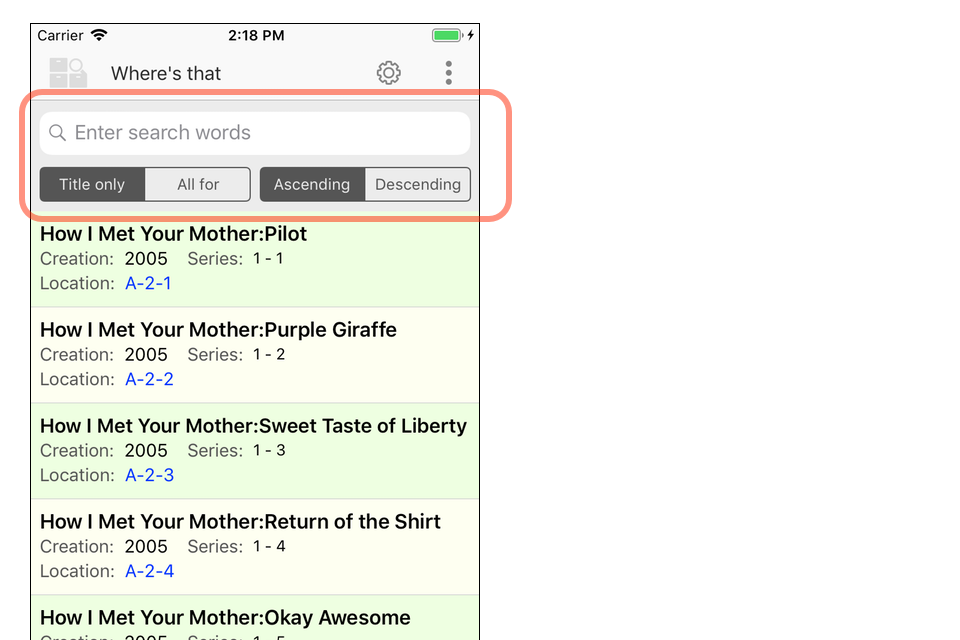
When you enter a search word in the search field, it will search automatically.
When all items(All for) are set as search targets, search categories and three extended items in addition to the title.
When a search word matches a part of an items, it becomes a hit target.
Inventory
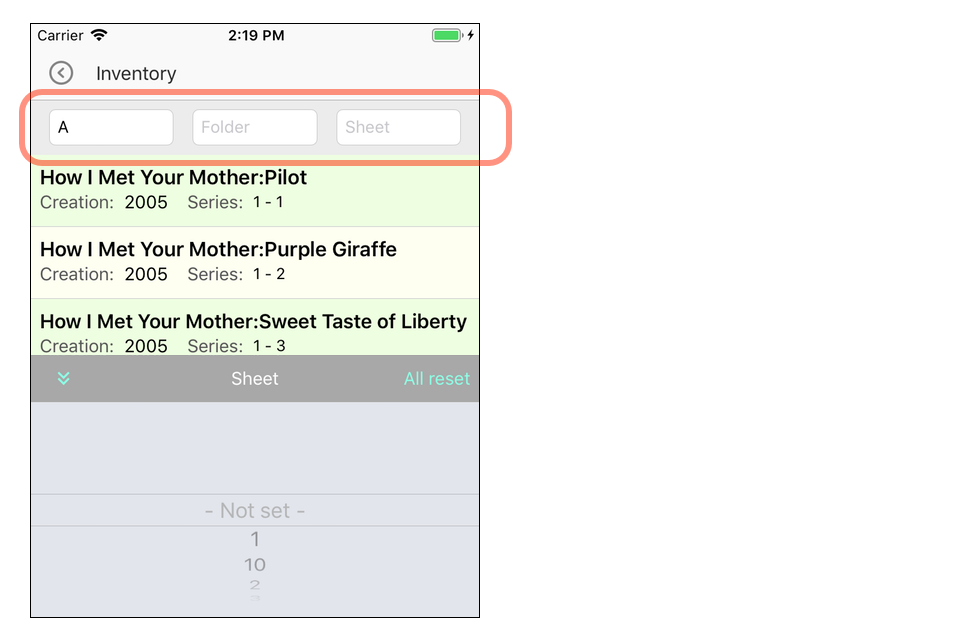
You can switch to the inventory screen with the menu icon tap at the top right of the top screen.
“Inventory” is used to check whether real things matches the data you have stored at your device.
By tapping the list data you can show details, and then you can modify or delete it.
Import/Export
You can switch to the import or export screen with the menu icon tap at the top right of the top screen.
Please note the character code when importing / exporting data including kanji.
The default character code for these processing is “UTF - 8”. When setting to “S-JIS” you can change it with “Setting”.
Note:
The data inside is saved as UTF-8.
When exporting with S-JIS, an error will occur if characters that can not be converted to S-JIS are included. (Eg pictograms etc.)
Import
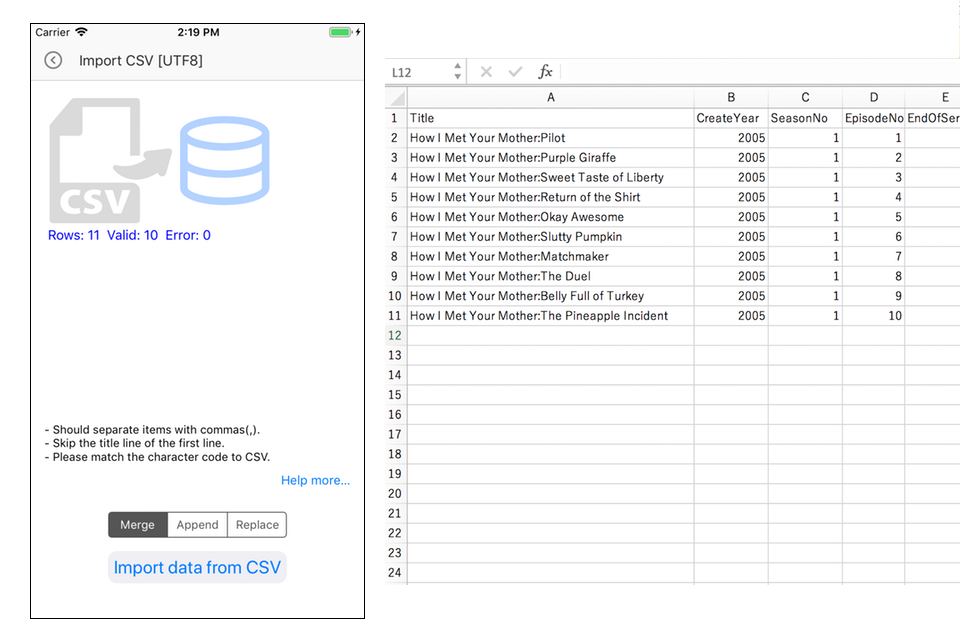
If the first item on the first line is “Title”, it will not be imported as a title line.
Imported data requires the following 13 items separated by commas (,).
- Title - Title
- CreateYear - Year of creation
- SeasonNo - Season number
- EpisodeNo - Episode number
- EndOfSeries - The end flag of the episode
- Category - Category
- Extended-1 - your own item 1
- Extended-2 - your own item 2
- Extended-3 - your own item 3
- Area-1 - Name of location 1
- Area-2 - Name of location 2
- Area-3 - Name of location 2
- ID - Unique ID
The title, category, and your own items can be up to 128 characters long and the location name can be up to 64 characters. In any case, comma or double quotation and special characters can not be included in the contents of the item.
Set 4 digits for the year of creation, 3 digits for the season number and episode number, and 1 for the number to set the end flag of the episode.
Although it is omissible except for the title, you need to adjust the number of commas.
Data exported from the app is automatically numbered for unique ID. Please do not set ID when adding new data.
It’s recommended that you export from your app, and check the item of data as a sample.
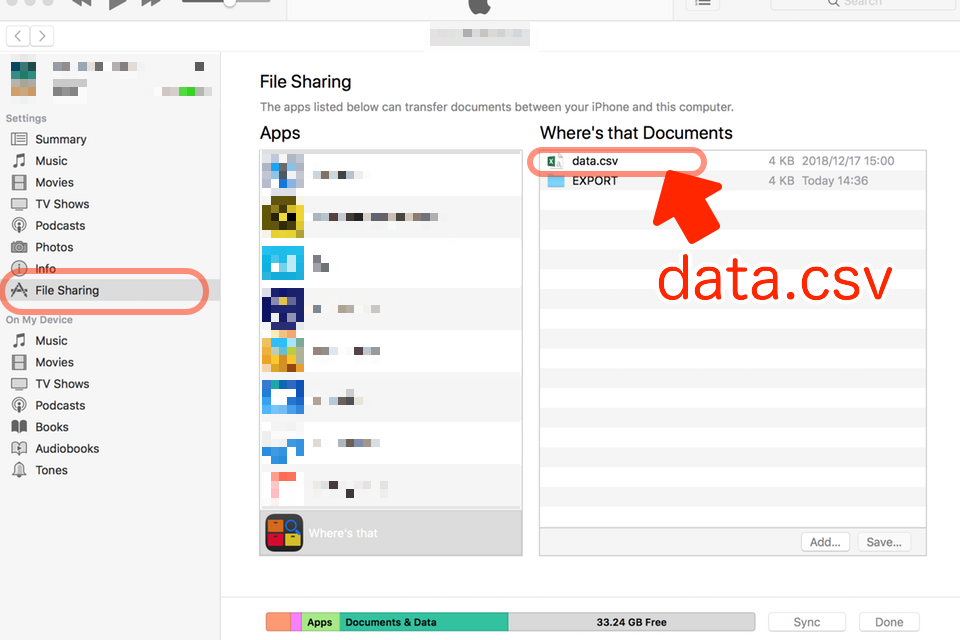
Before importing, connect to iTunes, select “Where’s that” from the apps list by “File sharing”, drag and drop the file name as “data.csv” to “Where’s thar Document”.
After drag and drop the file, when you open the import screen from the app, and then do checked the file automatically. If it has valid data to import, you can import it.
If there is an error in the import data, up to five lines with errors are showed. Please check the contents and retry.
There are three import modes below.
Merge
Data with the same ID will be overwritten and imported. Otherwise it will be added.Append
Add all as new data.Replace
Delete all existing data and then add as new data.
Export
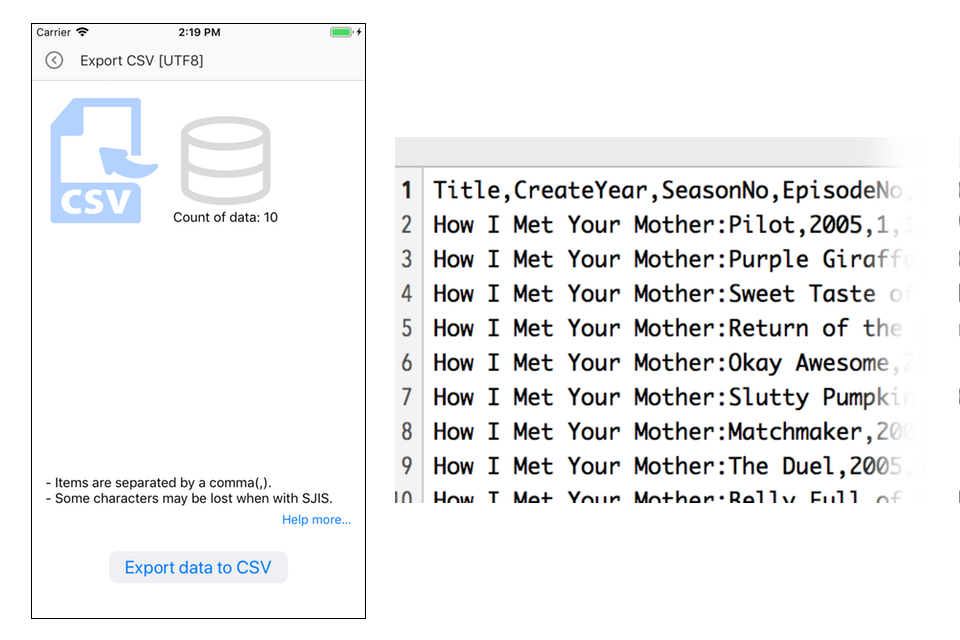
All data are subject, the data is output as a CSV file separated by commas (,).
The output file name is “data.csv”.
Note:
The item “ID” in the output csv file is automatically numbered to make the data unique. Please do not change “ID”, when you import by updated output csv file. If you change it, you can not be able to update the original data with import “Merge” mode.
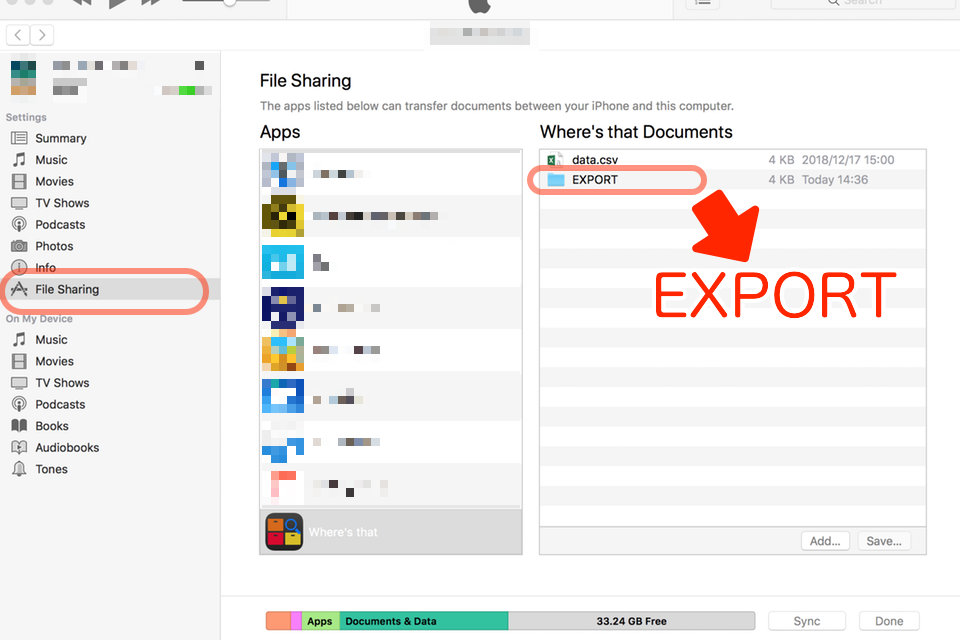
To check the output file, connect to iTunes, select “Where’s that” from the apps list by file sharing, and drag and drop “EXPORT” folder in “Where’s thar Document” to PC.
The file is overwritten every time it is processed. If necessary, please save it on PC before processing.
Special thanks
This app has made using the following open source library.
- RxSwift
- RxCocoa
- RxGesture
- SCLAlertView
- SVGKit
- XLActionController
This app’s any icons has made using the following site data.